In this article I will explain on getting started with Azure BizTalk Services.
There are quite a few tutorials on the internet but many are outdated since the February 2014 release of Azure BizTalk Services. Moreover, many are not detailed enough for the beginner or do not cover all the necessary aspects to have a complete system ready for development. My aim is to fill this gap and provide a complete, beginner-friendly guide to getting started with Azure BizTalk Services.
Consequently, this tutorial will cover both:
– How to provision a BizTalk Service in the Azure Portal.
– How to install and configure the necessary bits for the development machine so that we can develop Azure BizTalk Services.
I will also focus on some specific aspects related with a playground or development environment and thus considering cost aspects, which are also important for a personal playground environment. We indeed do want to optimize the spending of our hard-earned cash!
Azure BizTalk Services dependencies
First of all it is important to know that BizTalk Services has dependencies on other Azure Services, some of which also have a cost:
- Azure SQL Database: This is where the Tracking data is stored. See SQL Database Pricing Details
- Azure Storage: Archived messages are stored in Azure Blobs and Monitoring data is stored in Azure Tables. See Storage Pricing Details
- Azure Access Control Namespace: The Access Control Namespace is automatically created when provisioning a BizTalk Service instance (deployment). This namespace is used by Visual Studio to deploy a BizTalk Service project to the BizTalk Service deployment.
Cost considerations
<UPDATE>
Update: there is now a Free Edition of Azure BizTalk Services in Preview!
This tutorial can nevertheless still be used for all editions. The only consequence of the Free Edition on this tutorial is that the actual provisioning of the BizTalk Service is simplified. I cover Azure provisioning in paragraphs 1.1, 1.2 and 1.3 in this article and so only these 3 paragraphs are affected (and simplified). For playground environment it is obviously advisable to first use the Free Edition and go for a Developer Edition when you need some features not covered in the Free Edition. Indeed, at time of writing, the Free Edition is still missing many features. See the BizTalk Services Editions Chart.
</UPDATE>
Azure BizTalk Services is a PaaS service and as with all cloud services, the pricing is on a per-usage basis.
Azure BizTalk Services comes in several editions (Developer, Basic, Standard, and Premium), see BizTalk Services Editions Chart. Each edition has a different pricing, see BizTalk Services Pricing Details.
Azure BizTalk Services is pricey for a playground environment as, at time of writing, the cheapest subscription (the Developer edition) costs 0.097 EUR / hour, which is about 2.328 EUR / day and amounts to close to 73 EUR / month. So, once we are done with the playground it is advisable to take the BizTalk Service down.
A Backup and Restore functionality exist for BizTalk Services but it is not available for BizTalk Service Developer Edition, it is only available for other editions. This feature would come in handy to avoid paying for the BizTalk Service when we don’t use it so I wish it would also be available for the Developer edition.
<UPDATE>
Update: A Backup/Restore feature is now available for the Developer edition!
At this time, only the free Edition does not cover Backup and Restore. Moreover, a lot of the MSDN documentation still mentions that the Developer edition cannot do backup/restore but I have had a look and it seems to work.
</UPDATE>
On top of the cost of the BizTalk Service, 2 other dependencies incur cost as well: Azure SQL Databases and Azure Storage.
While, at time of writing, the smallest SQL Azure Database edition is quite cheap (3,72 EUR / month for a 100 Mb Web Edition SQL Database), it is possible to have an Azure SQL Database for free which is even better for people who neither have their own MSDN account (which comes with free Azure credit) nor have access to one at the office.
So, if all you want to do is to experiment a little with BizTalk Services, the free database will be enough. It is unfortunately not possible to create a free SQL Database from the SQL Database section of the Azure Portal. At time of writing, the only way I know of is to create it from the from the Web Sites section of the Azure Portal.
The SQL Database section of the Azure Portal does not allow for free Database creation:
 The Web Sites section of the Azure Portal allows for free SQL Database creation:
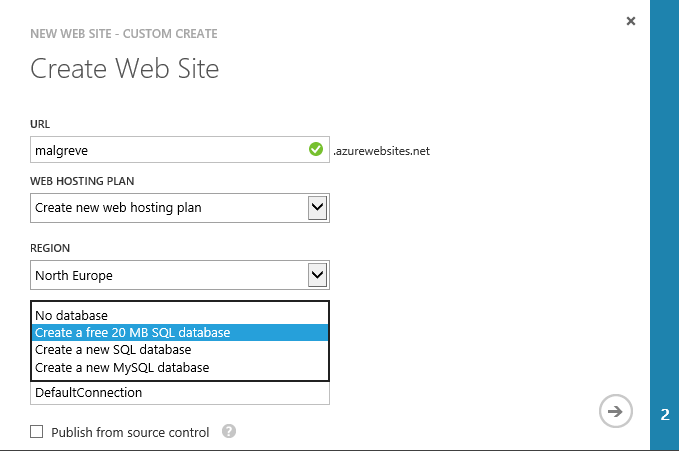
With this information in hand, you can choose to either go for the free (but extra small) SQL database or go for a paid one.
I will now explain how to provision a BizTalk Service instance through the Azure management portal and how to get the development environment ready. Note that a BizTalk Service instance is also referenced to as a BizTalk Service deployment in the documentation.
1. Provisioning an Azure BizTalk Service Deployment
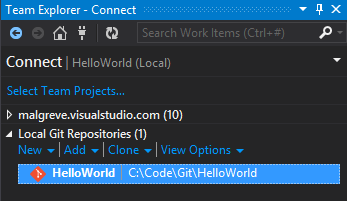
1.1. Create a SQL Database.
The first step is to create a SQL Database, especially if we choose to go for a free SQL Database. This is because as I have explained earlier, at time of writing, the only way to create one through the portal is by creating a free Web Site.
1.2. Create a Storage.
The second step is to create an Azure Storage. We can also optionally choose to create it later as the BizTalk Service creation wizard offers the possibility to create one with default settings (notably, the replication model is “geo redundant” but that can be changed afterwards). The level of redundancy drives the price, the cheapest being “locally redundant”.
For obvious cost and performance reasons, we should create SQL Database and Storage deployments in the same region as the BizTalk Service.
Note that on a production environment, we would want to create Storage and SQL Database exclusively to be used by BizTalk Services. Nevertheless, for a playground environment, we can re-use existing SQL Database and Storage so that we lower cost to as little as possible.
1.3. Create a BizTalk Service deployment.
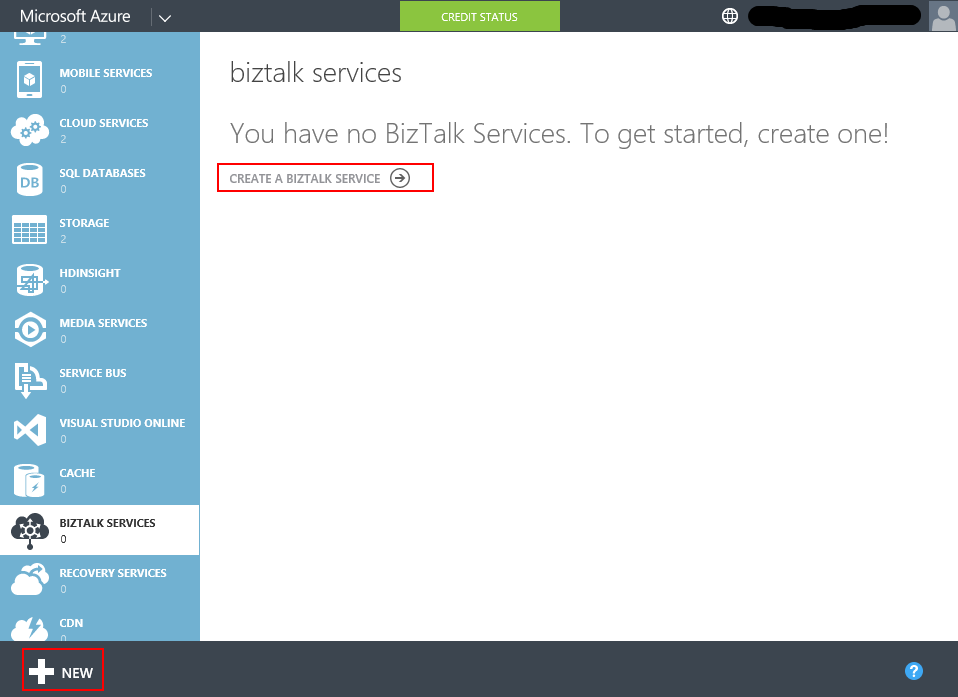
The third step is to create the BizTalk Service deployment (instance).
- In the Azure Management portal, click on BizTalk Services on the left panel and then click either on the New or Create a Biztalk Service link. This will prompt the Create BizTalk Service wizard to pop up.
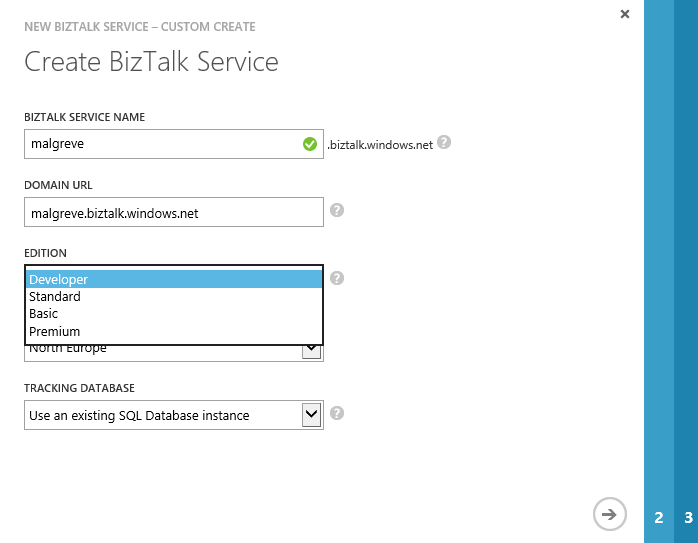
- In the Create BizTalk Service wizard first page we define:
- A (unique) Name for the BizTalk Service deployment.
- The BizTalk Service edition. At time of writing, there are 4 editions: Developer, Basic, Standard and Premium. In the scenario of a playground deployment, the Developer edition will be enough.
- The region we want to create the BizTalk Service in.
- Create or re-use and existing SQL Database instance to hold the Tracking database. If we use an existing SQL Database instance, make sure that it is in the same region as the BizTalk Service we are currently creating. In my playground deployment, I have chosen to use an existing SQL Database instance (a free 20 Mb SQL Database instance).
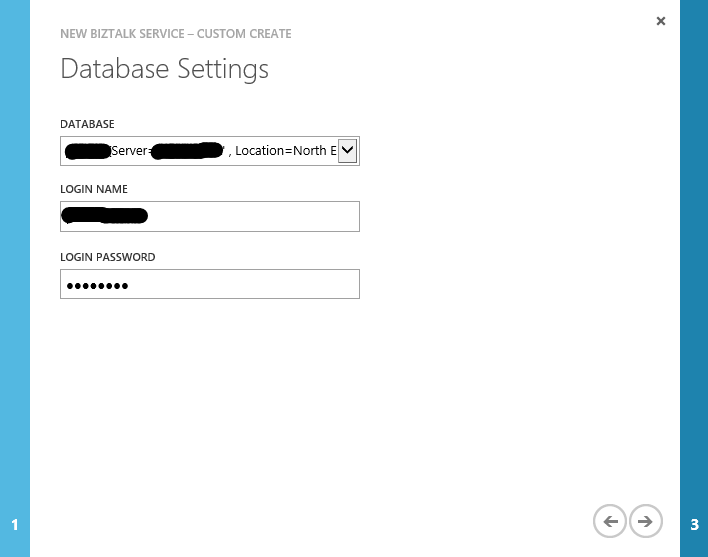
- In the second page of the wizard, Database Settings, we set the necessary credentials to connect to the SQL Database instance which will hold the Tracking Database.
- In the third and last page of the wizard, we set the storage account used to store monitoring data and archived messages. We can either choose and existing storage account (which should be in the same region as the BizTalk Service instance we are creating) or create a new one.
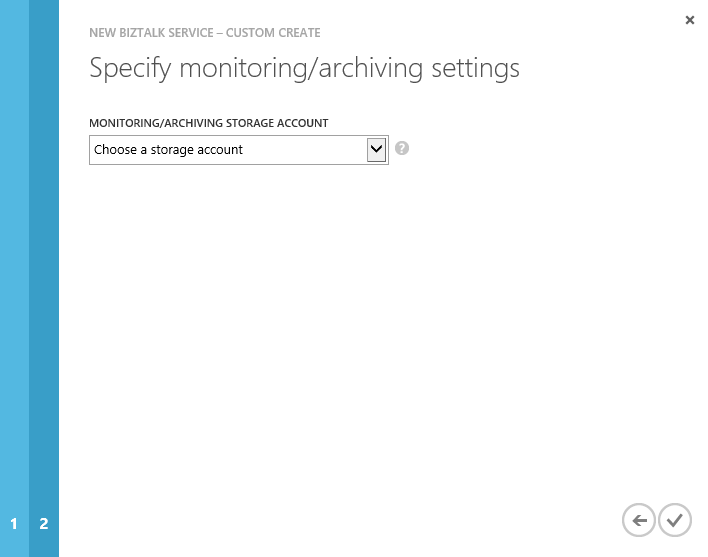
Once we click the final button, the deployment takes about 30 minutes to complete.
1.4. Get BizTalk Service credentials (ACS).
Once the BizTalk Service is provisioned, we want to write down the ACS ( Access Control Service) credentials. To do so, when the BizTalk Service is selected, click on the Connection Information button at the bottom of the Azure Portal:

The Access Connection Information panel opens, take note of the Default Issuer and Default Key values. We will use them later to configure the BizTalk Service portal.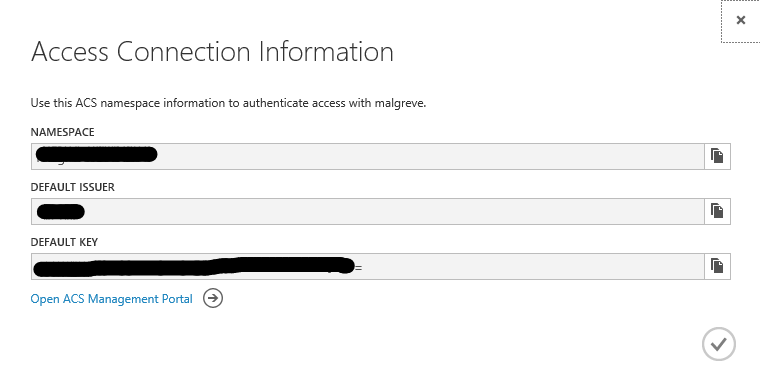
1.5. Registration of the BizTalk Service to the Azure BizTalk Services portal.
The Azure BizTalk Services Portal is a specific management portal for BizTalk Services where we can:
– Manage the various artifacts deployed to the BizTalk Service subscription (schemas, transforms,…).
– Manage B2B operations (EDI and X12): Manage Partners (called Party in BizTalk Server) and Agreement (also called Agreement in BizTalk Server).
See Using the BizTalk Services Portal for more information on the Azure BizTalk Services portal.
To register the BizTalk Service deployment to the portal:
- In the Azure Portal, select the concerned BizTalk Service and click on the Manage link at the bottom of the screen.

- The Azure BizTalk Services Management portal opens where we will put in the ACS Issuer name and ACS Issuer secret. These are the values we copied from the Connection Information screen the previous step 1.4 (there, the fields are called Default Issuer and Default Key). Once issuer and key values are copied, click Register.
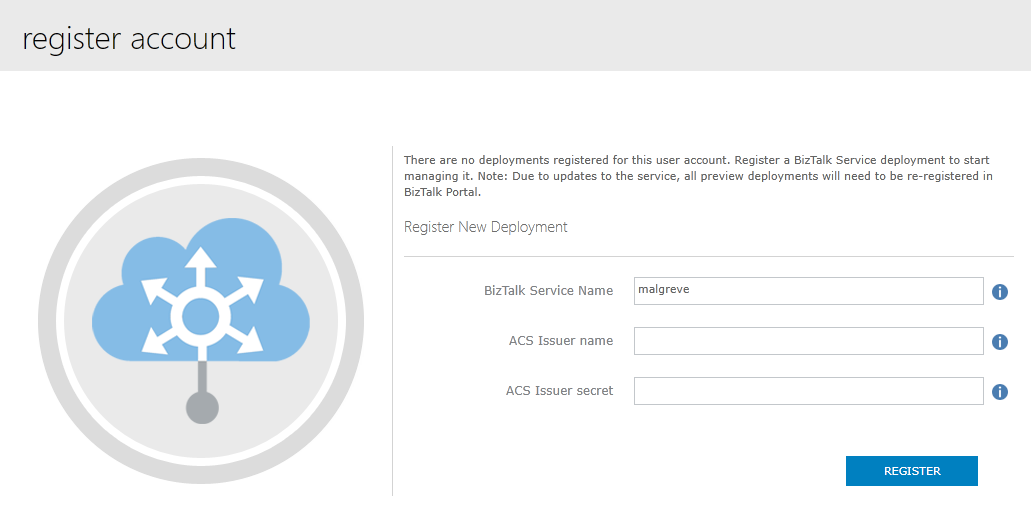
Once we have registered The BizTalk Service Deployment, we have access to the Azure BizTalk Services portal for BizTalk Service we have just created: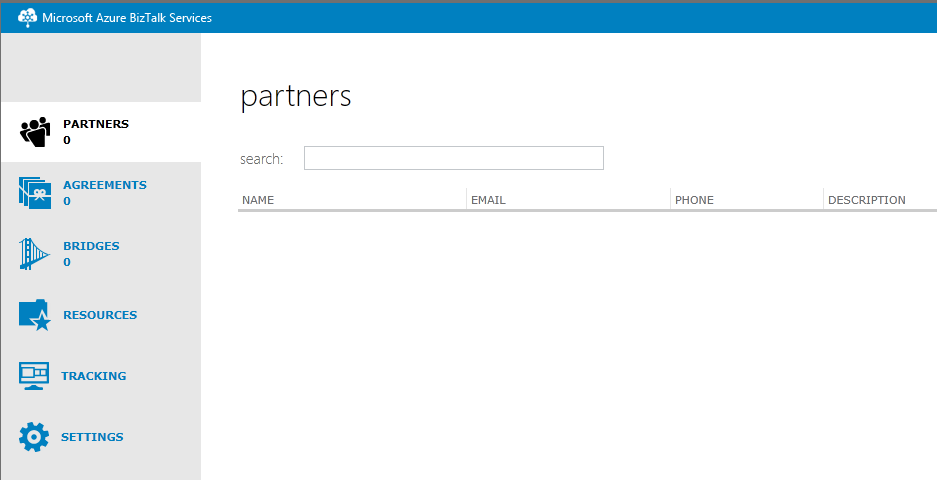
2. Setting up the Development environment: installing the Azure BizTalk Services SDK.
In this section I will cover the procedure to do a complete installation of the Azure BizTalk Services SDK on a development environment.
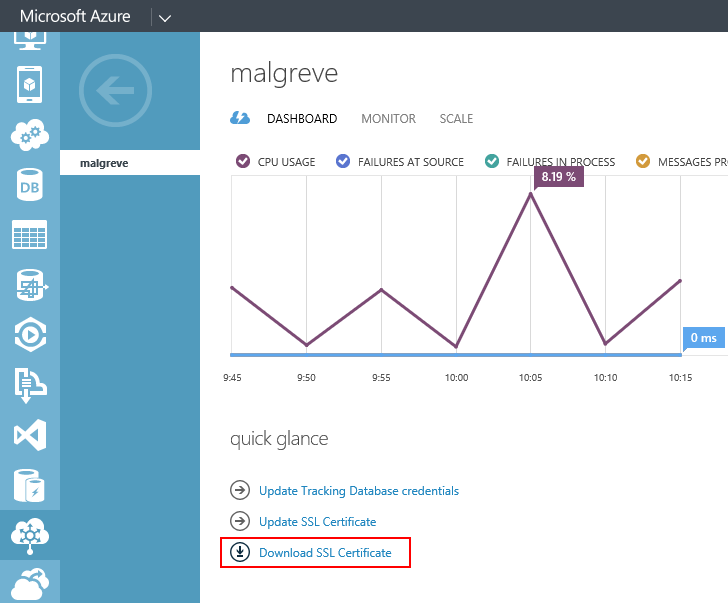
2.1. Download the SSL certificate of the BizTalk Service Depoyment.
Once you have created a BizTalk Service, the endpoint of the BizTalk Service is a URL in the following format: <BiztalkServiceName>.biztalk.windows.net. For clients to be able to connect to the BizTalk Service deployment, a secure SSL connection must be established. As for playground/development environments, we can use the self-signed certificate which is automatically generated when creating an Azure BizTalk Service, we need to install it in the trusted Trusted Root Certification Authorities Store on every client/developer machine that needs connectivity to the BizTalk Service deployment. That way, the local machine(s) will accept the server certificate of the BizTalk Service deployment and the SSL connection will be possible. For production environment, we should request a certificate provided by a certificate authority (CA).
- Download the self-signed public certificate (.cer) from the dashboard of the BizTalk Service. This certificate was automatically created when we provisioned the BizTalk Service deployment in the first part of this tutorial. In the BizTalk Service Dashboard, click on Download SSL Certificate:
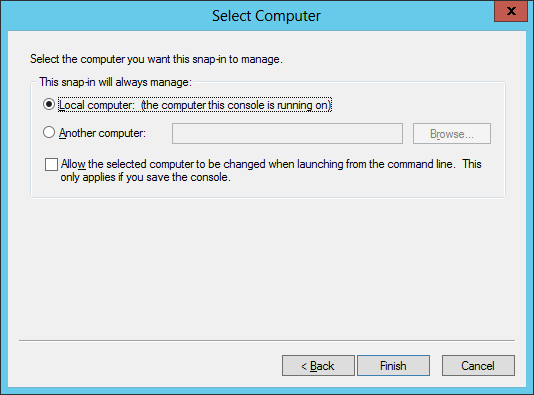
- Once the certificate is saved on disk, run the mmc command and add the Certificates snap-in for the Computer account:
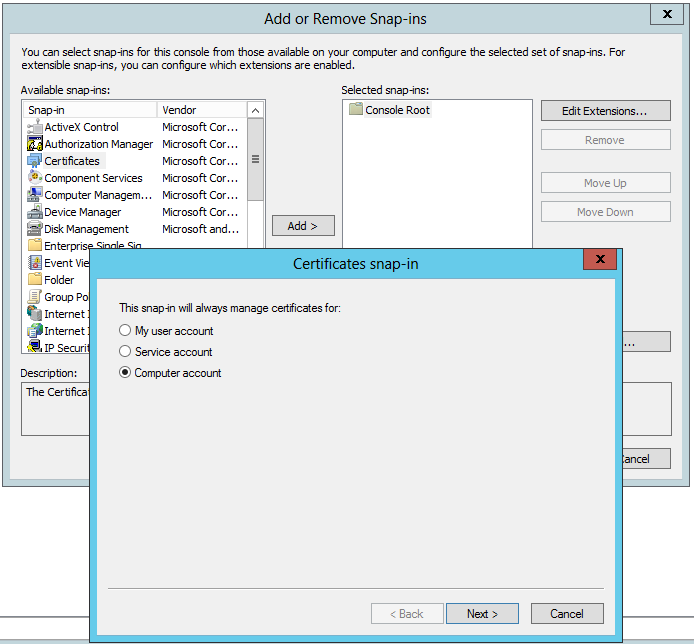
- We select the Local computer as this is the computer that will run the SDK and will need a secured connection (SSL) with the BizTalk Services deployment running in Azure Cloud:
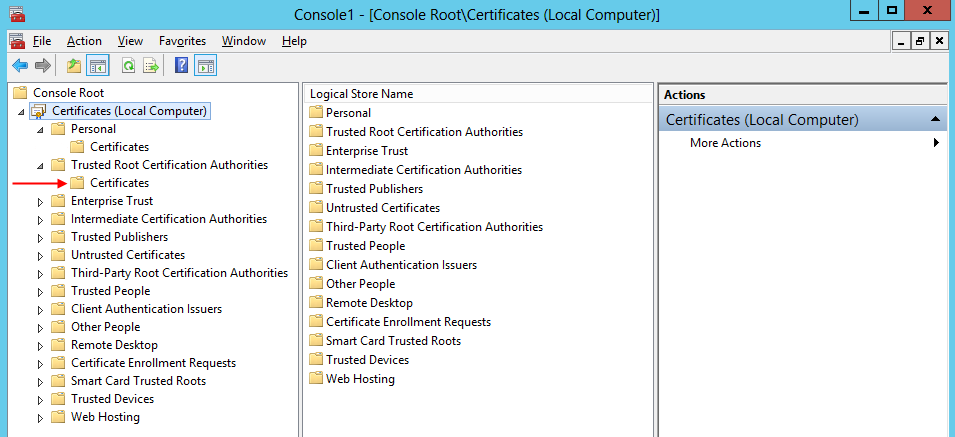
- The final step is to add the certificate in the Trusted Root Certification Authorities certificate store:
2.2 Create a self-signed certificate for securing the BizTalk Adapter Service Runtime.
On the development machine, when installing the Runtime part of the Azure BizTalk Services SDK, an on-premise web service running in IIS is installed. It is called the BizTalk Adapter Service. The BizTalk Adapter Service is sometimes reference to by its acronym (BAS). Note that it is the same acronym as the retired BizTalk Server Business Activity Services (BAS) but of course not related.
The BAS web service needs to be secured and for that we need a self-signed certificate for which we have a private key (by contrast, the certificate downloaded from the portal is the certificate belonging to the BizTalk Service deployment and so contains only the public key). On a production environment we would want to use a certificate issued by a certificate authority to secure the BAS on-premise web service.
We will create a self-signed certificate for the machine where we will install the BAS web service runtime, which, for a typical development environment, is the development machine where we install the Azure BizTalk Services SDK.
So, as the development machine will run the BAS runtime, we will create a self-signed certificate for that development machine name:
- Create the self-signed certificate that will be used secure the BAS Web service that will be created in IIS when installing BizTalk Adapter Service (which is part of the Azure BizTalk Services SDK runtime feature). The following line creates a certificate in the Trusted Root Certification Authorities of the Local Computer certificate store (parameter -sr LocalMachine and -ss root). Note that with Visual Studio 2012, makecert is located at: C:\Program Files (x86)\Windows Kits\8.0\bin\x64
makecert -pe -r -n "CN=yourlocalmachinenamehere" -e "10/05/2018" -sr LocalMachine -ss root
- Export the private key of the self-signed certificate from the certificate store. In the sample hereunder, the password of the private key is “Password”:
certutil -exportPFX -p "Password" root yourlocalmachinenamehere yourlocalmachinenamehere.pfx
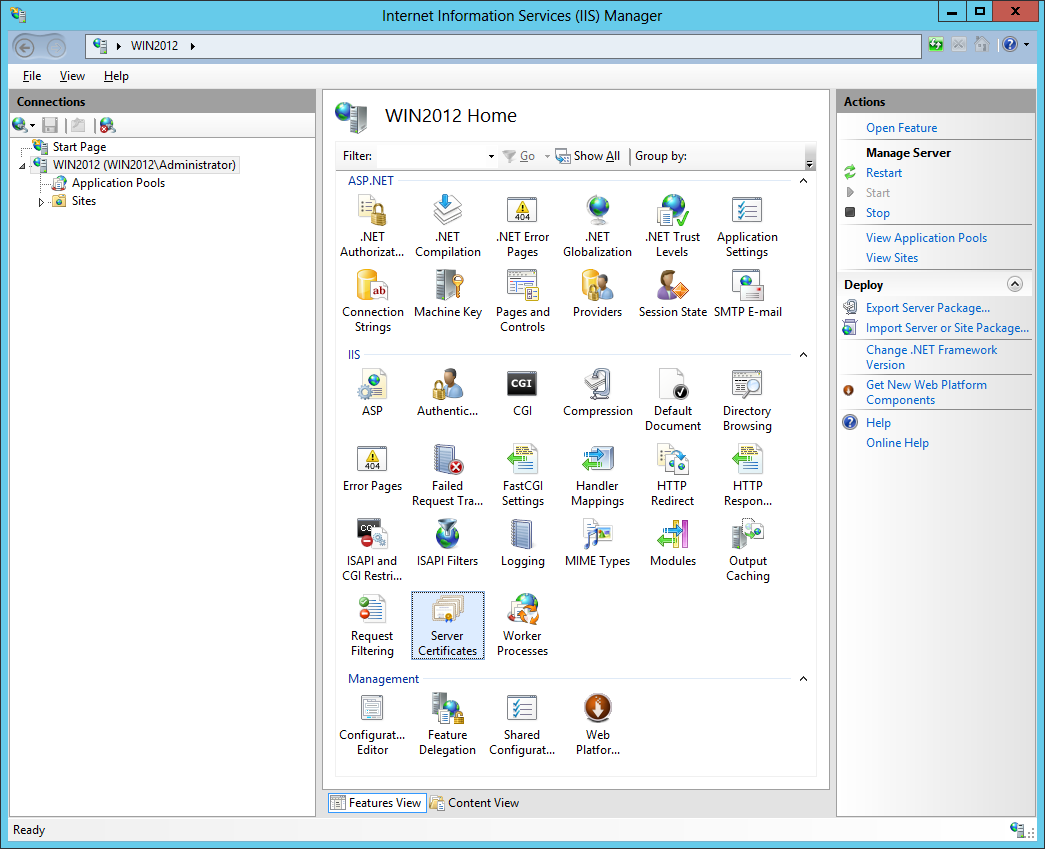
- Import the certificate in IIS:
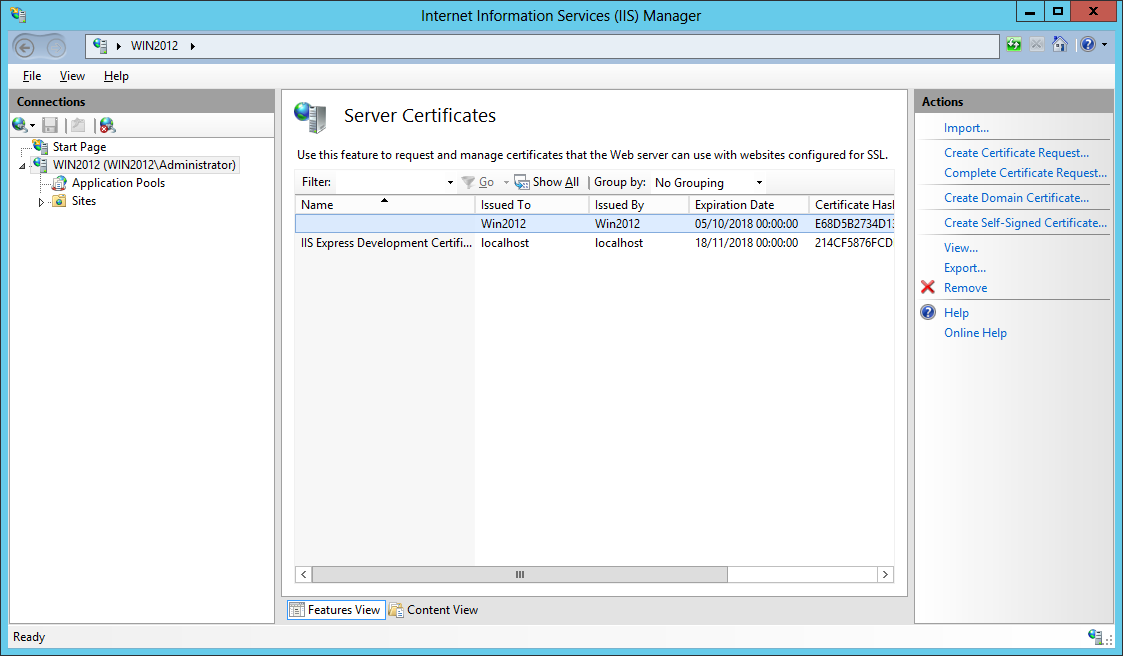
- Open IIS Manager and double click on the Server Certificates icon:
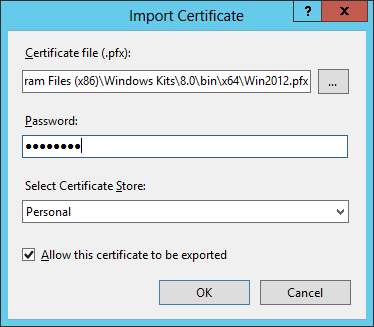
- Right-click on the screen and select Import. In the Import Certificate pop-up Windows, select the private key (.pfx file) we exported in the previous step and enter the password. Leave the other default options as they are (Certificate Store “Personal” and checkbox “Allow this certificate to exported” ticked):
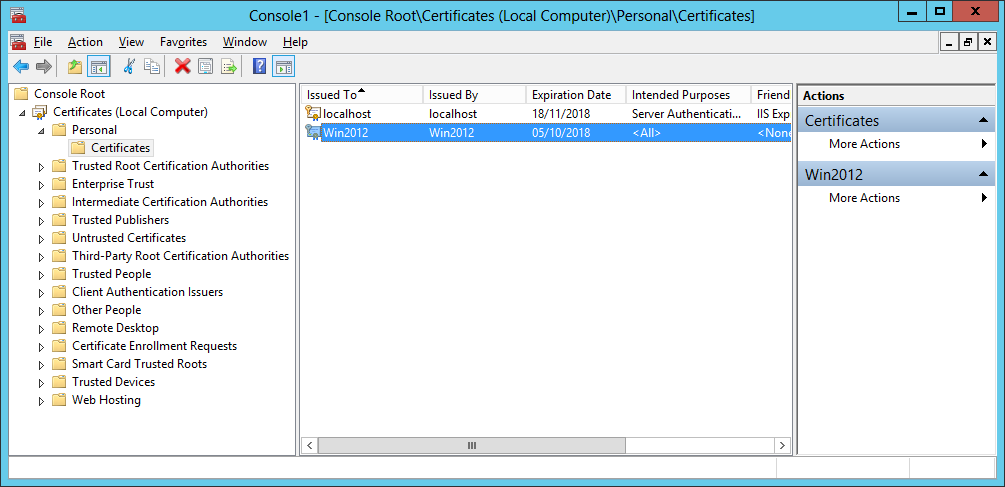
- The certificate is now visible in the Server Certificates section of IIS and in the Local Computer Personal Certificate Store:
2.3. Installing the Azure BizTalk Services SDK.
The Azure BizTalk Services SDK contains the necessary bits to create BizTalk Services project in Visual Studio as well as other necessary binaries .
The SDK contains 3 main features:
– The developer SDK which is used to develop BizTalk Services applications. It contains Visual Studio BizTalk Services project template (bridges) and BizTalk Services Artifacts project template (transforms and schemas). This feature is installed on development machines only.
– The Runtime which manages connectivity between Azure BizTalk Services applications and the on-premise Line-Of-Business (LOB) application. If the Azure BizTalk Services application does not need to connect to an on-premise application, this component does not need to be installed. This feature is installed wherever we need the runtime, typically production and development machines.
– The Tools which includes Windows PowerShell cmdlets to manage both the BizTalk Adapter Service Runtime components and the deployed BizTalk Services applications. This feature is installed on both production and development machines.
The requirements to install the Azure BizTalk Services SDK are:
- Windows 7 and up or Windows 2008 R2 and up.
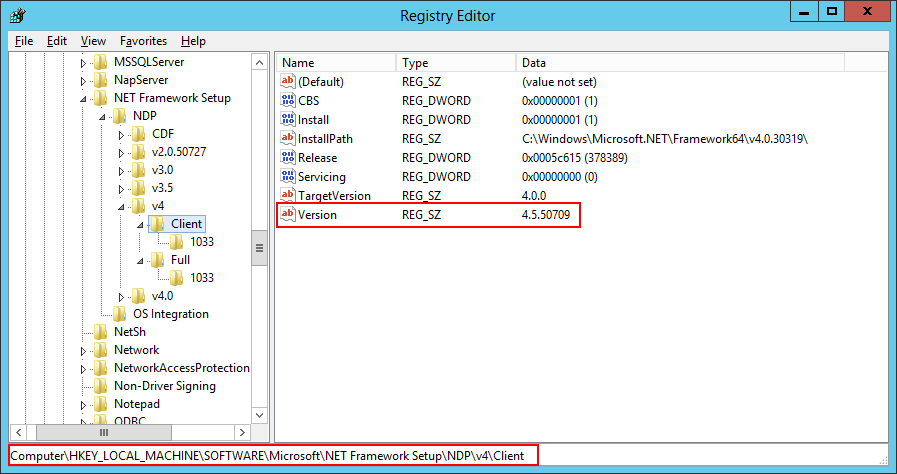
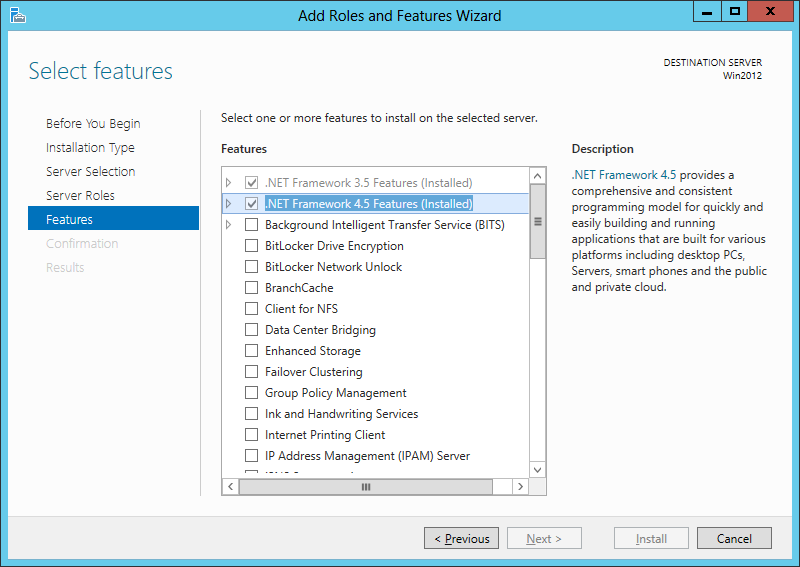
- The .Net Framework 3.5.1 and 4.5. To check if you are running .Net 4.0 or 4.5, which is not that straightforward as they both show up as runtime v4.0.30319 in IIS and in C:\Windows\Microsoft.NET\Framework (the reason being that 4.5 is an in-place upgrade from 4.0, not a side-by-side install with 4.0), we can either:
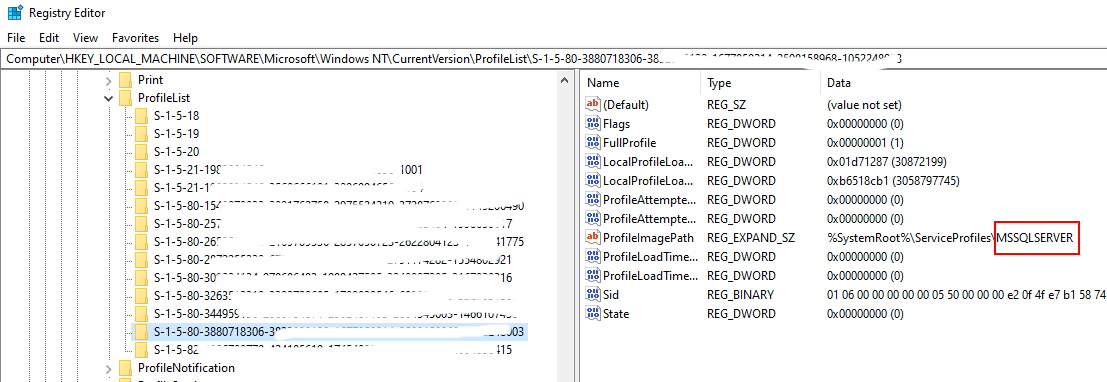
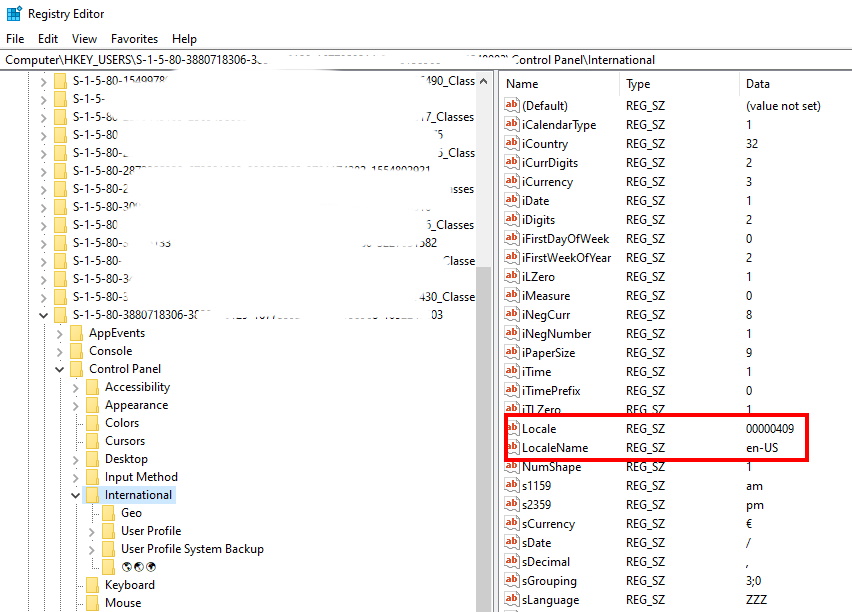
- Look in the Registry:
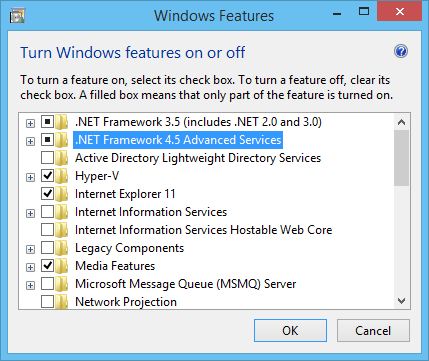
- Check Windows Server Roles and Features (or the Windows Features on client versions of Windows):
- Windows PowerShell 3.0 or above(run the $PSVersionTable command in PowerShell to check which version you are running).
- Visual Studio 2012. Visual Studio 2013 is not supported.
- Make sure that Windows Authentication is Enabled in IIS (it was disabled by default on my machine)
Once we are sure we have all prerequisites, we can go ahead and install the Azure BizTalk Services SDK with the following procedure:
- Download the Azure BizTalk Services SDK here. In the pop-up window. choose either WindowsAzureBizTalkServicesSetup-x64.exe or WindowsAzureBizTalkServicesSetup-x86.exe depending on the version of Windows installed (64 or 32 bit).
- After having downloaded the adequate executable, run it as Administrator.
- In the License Term screen, tick the checkbox “I accept the terms in the License Agreement” and click Next:

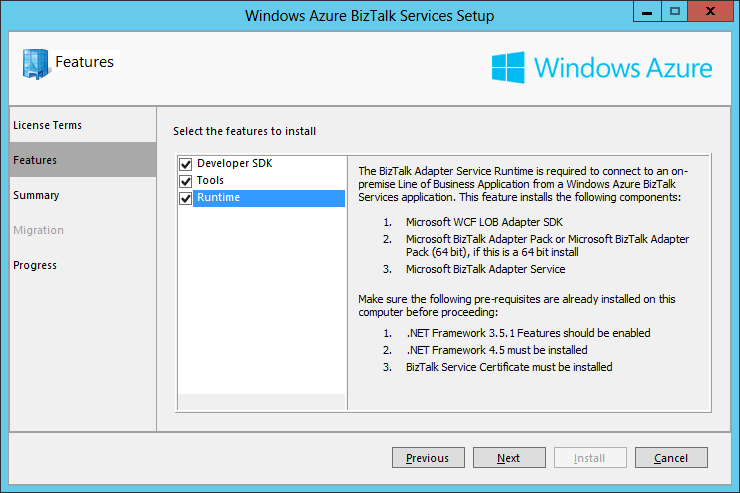
- In the Features screen we choose which features we want to install. On a development machine we want all of them: The Developer SDK, the Runtime and the Tools. On a Production environment we would typically install only Tools and Runtime. Once the necessary features are selected, click Next.
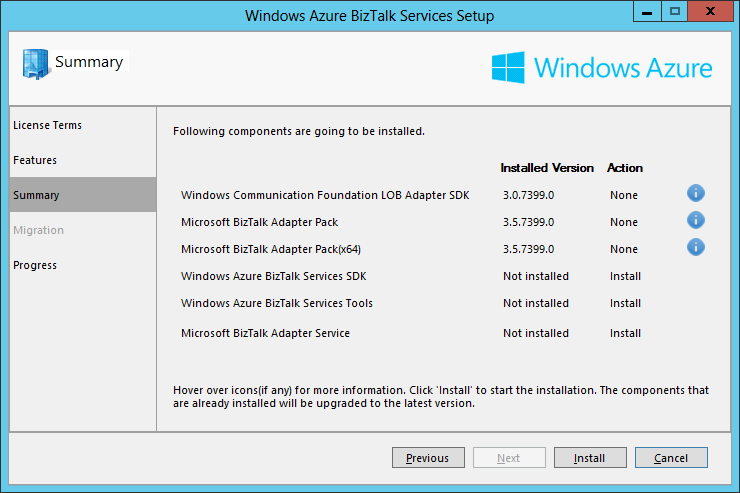
- The Summary screen displays the components to install for the features selected in the previous screen. We can see that the components that are already installed on the machine have their Action set to None and the ones that still need to be installed have their Action set to Install. As I am installing the SDK on a machine where I have already installed BizTalk Server 2013 and the Adapter Pack, these components do not need to be installed anymore. Click Install:
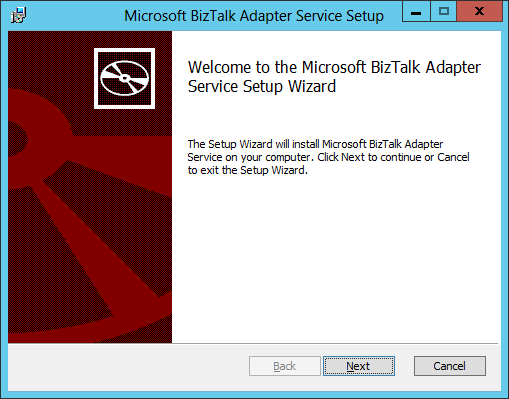
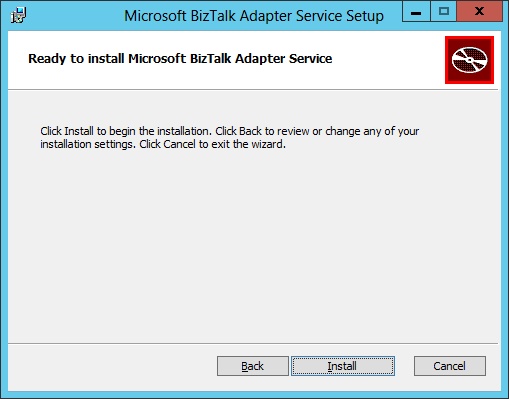
- At some point, the BizTalk Adapter Service (BAS) setup procedure will start. This is a separate msi which is launched as part of the overall BizTalk Adapter Services Setup. The BizTalk Adapter Service is part of the on-premise Runtime feature of Azure BizTalk Services and is used for communication between Azure BizTalk Services and on-premise Line-Of-Business (LOB) applications. On the welcome screen, click Next:
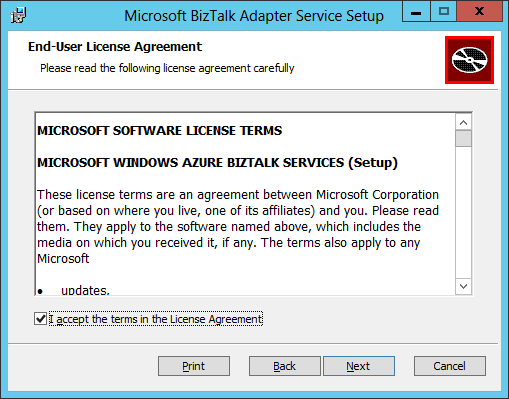
- In the End-User License Agreement screen, tick the checkbox “I accept the terms in the License Agreement” and click Next:
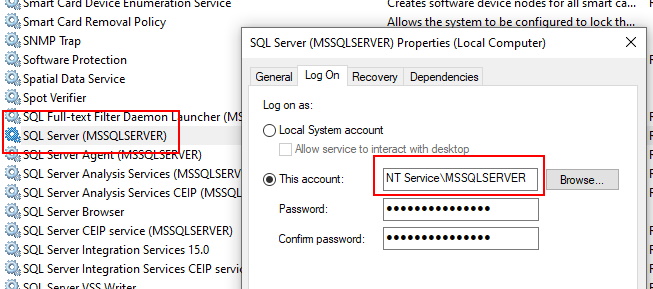
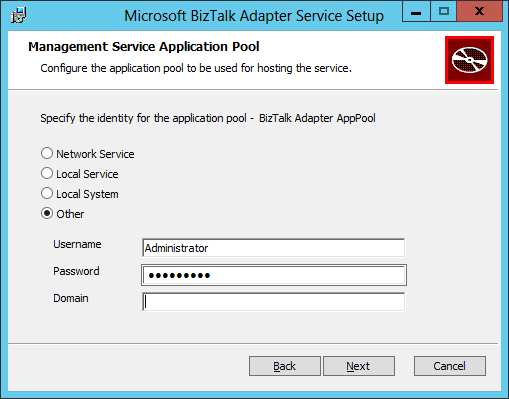
- In the Management Service Application Pool screen, we need to provide a service account which will run the Biztalk Adapter Service (BAS) IIS application pool (named BizTalk Adapter AppPool). The service account needs to have the Administrator role on the local machine and have access to the Internet. On my lab machine, I am using my own local account. A better practice is to create a service account and add it to the local Administrators Group instead of using a user account. Leave the Domain field blank if using a local account. After having entered the service account and password, click Next:
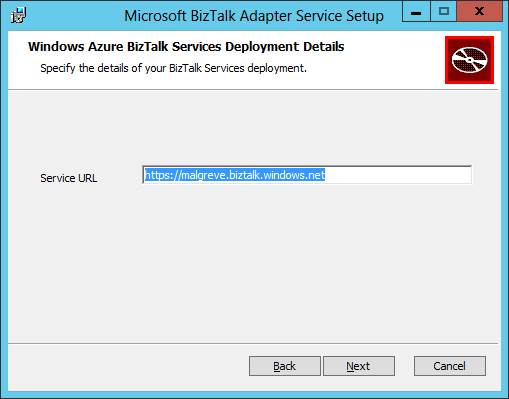
- In the Azure BizTalk Services Deployment Details screen, we need to input the URL of the BizTalk Services deployment instance we have created through the Azure Portal in the first part of this tutorial. The URL is in the form of: https://<deployment name>.biztalk.windows.net. The reason we need to give the BizTalk Service deployment URL is that the BizTalk Service solutions created in Visual Studio will use the BizTalk Service artifact store to keep the configuration settings of the BizTalk Adapter Service components (LOB Relays, LOB Targets,…). Click Next after having input the BizTalk Services deployment URL:
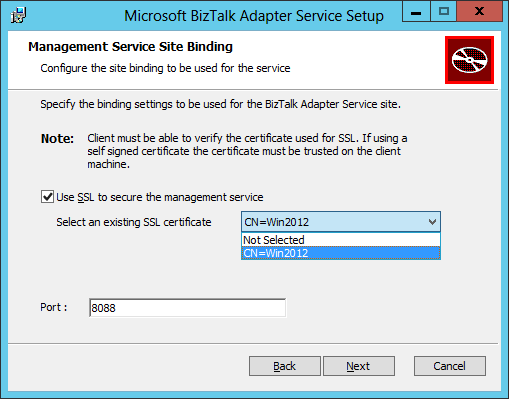
- In the Management Service Site Binding screen:
- Tick the Use SSL to secure the management service checkbox to encrypt HTTP communication with the on-premise BAS Management Web Service with SSL.
- Specify the SSL certificate that we created and imported in IIS in the previous step: Create a self-signed certificate for securing the BizTalk Adapter Service Runtime. Remember that for production environment we should use a certificate provided by a trusted certificate authority.
- Specify the port number the BizTalk Adapter Service web service will be running on (this web service is installed in the local machine’s IIS). The default value is 8080. I chose a different port as I already had an IIS Website running on port 8080.
- Click Next.
- In the final screen, click Install:
- Once the BizTalk Adapter Service installation has completed, click Finish:
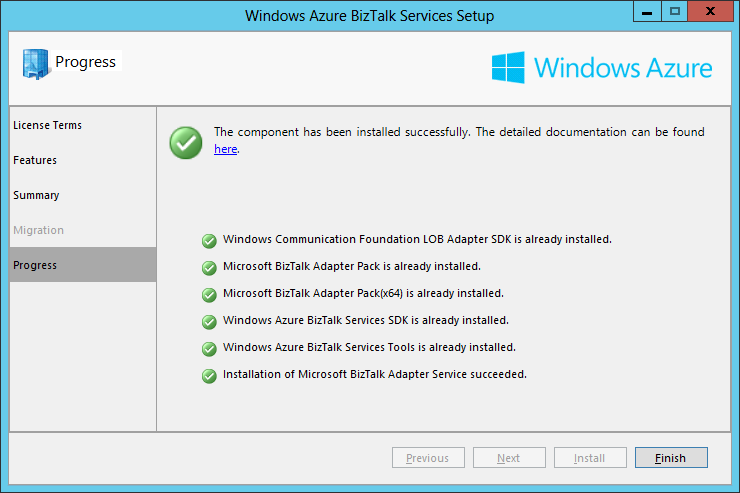
- We are now back on the Windows Azure BizTalk Services Setup screen, click Finish:
Note on BAS:
We can see that a Web site called BizTalk Adapter Service has been created in IIS and that it contains a single web service application called BASService, itself containing a single web service which is the Management Service of BAS (BizTalk Adapter Service) which is used for runtime connectivity with the Azure cloud. See BizTalk Adapter Service on MSDN for more information.
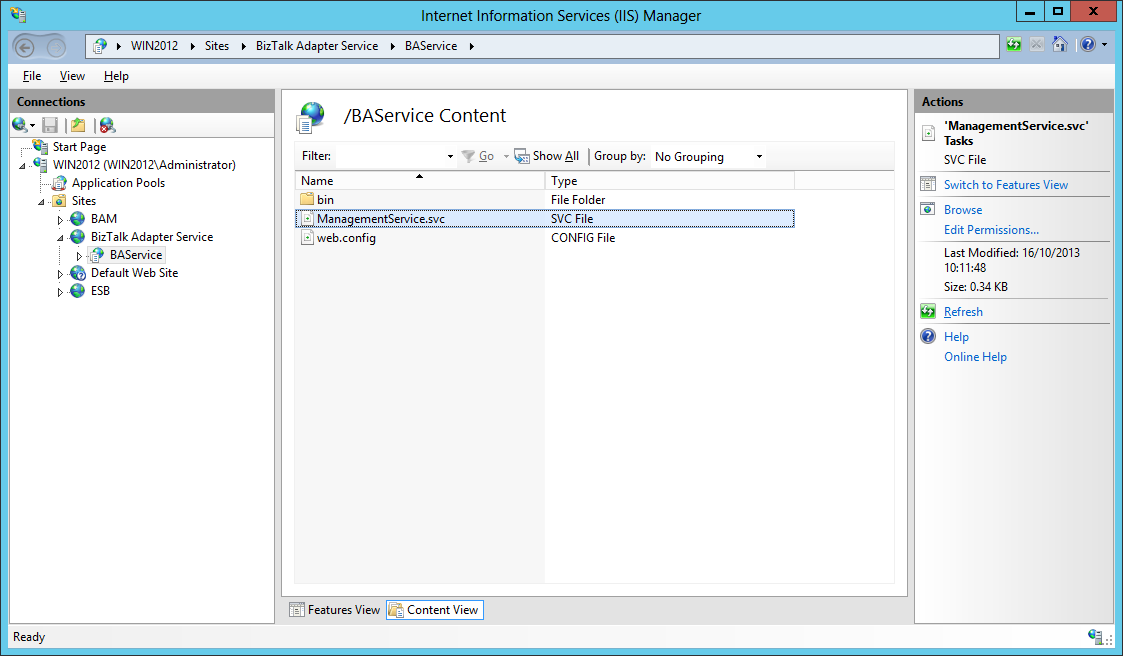 We can also see the BizTalk Adapter AppPool application pool created to run BAS management service.
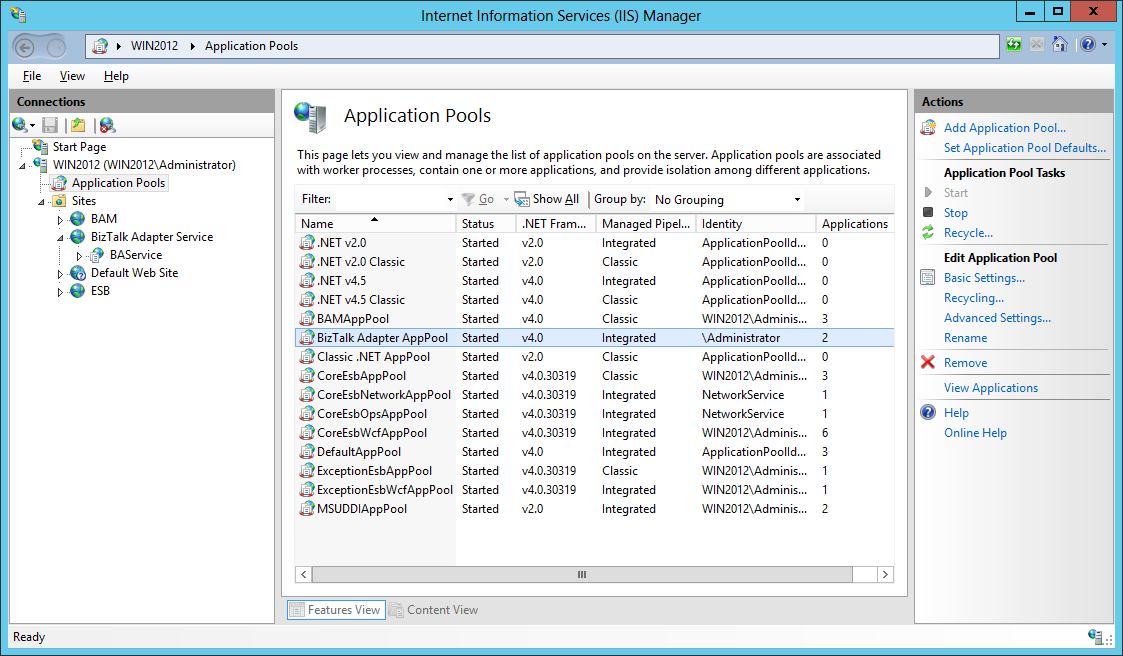
2.4 Configuring the BizTalk Adapter Service.
As creating LOB Targets to access from the cloud is done through Server Explorer in Visual Studio and as Visual Studio is doing this task through the BAS Management Service installed in IIS, we must configure Visual Studio with the management service accordingly.
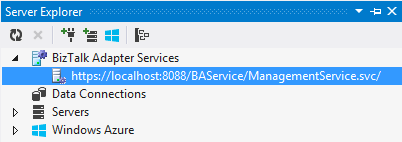
- Launch Visual Studio 2012 and open Server Explorer.
- Expend the BizTalk Adapter Services node and see the BAS management service installed in the previous step. It was automatically added for me but if it is not, you can add it manually.
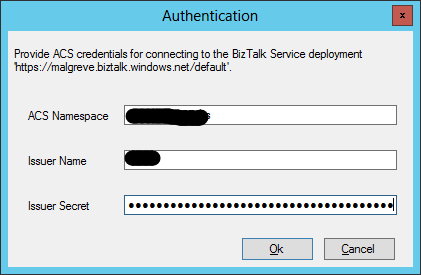
- Click on the service and you will be prompted for the ACS credentials of the Azure BizTalk Services deployment instance. We get these from the Azure Portal as I explained in the previous step (1.4). Once the ACS credentials are copied, click Ok.
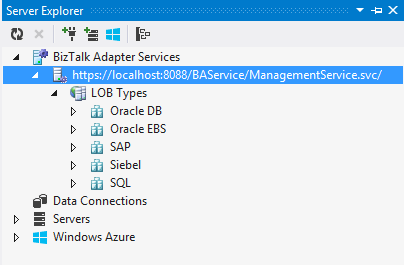
- Once the credentials are set, we can expend the BAS management service node to see the various LOB Types:
3. Final Notes.
3.1. Installing BizTalk Adapter Service failure.
Installing BAS fails with the following error when the BAS certificate is not created or installed properly as explained in the installation step Create a self-signed certificate for securing the BizTalk Adapter Service Runtime.
The Windows Application Event Log shows the following message:
Windows Installer installed the product. Product Name: Microsoft BizTalk Adapter Service. Product Version: 2.0.40214.0. Product Language: 1033. Manufacturer: Microsoft Corporation. Installation success or error status: 1603.
Note that the event is not written in the Application Event Log as an Error but as an Information level event.
In the log file created by the Azure BizTalk Services setup, the following error is written:
SBConnectCA: ERROR: System.Runtime.InteropServices.COMException (0x80070520): A specified logon session does not exist. It may already have been terminated. (Exception from HRESULT: 0x80070520)
at Microsoft.Web.Administration.Interop.IAppHostMethodInstance.Execute()
at Microsoft.Web.Administration.Binding.AddSslCertificate(Byte certificateHash, String certificateStoreName)
at Microsoft.Web.Administration.BindingManager.Save()
at Microsoft.Web.Administration.ServerManager.CommitChanges()
at Microsoft.ApplicationServer.Integration.AFConnect.IISHelper.CreateWebsite(String websiteName, String physicalPath, String appPoolName, String certificateThumbprint, Int32 port)
at Microsoft.ApplicationServer.Integration.AFConnect.Program.Configure(Session session)
3.2. SQL Server dependency removed.
Some of the documentation / internet resources still mention about a dependency on SQL Server:
– A software requirement to have SQL Server installed on-premise.
– The service account running the BizTalk Adapter AppPool IIS application pool to have sysadmin role on the on-premise SQL Server.
Since the release of Azure BizTalk Services February 2014 Update, LOB artifacts are not stored on an on-premise instance of SQL Server anymore but on Azure SQL Databases instead. Consequently, the SQL Server dependency has disappeared.
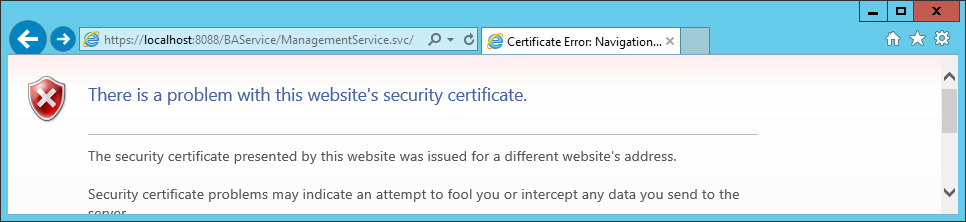
3.3. Error when browsing to the BAS Management Service.
If you try to browse to the BAS Management web service and there is a certificate error, that is because either:
– You browse through localhost instead of the machine name.
– The certificate you created does not correspond to the machine name. When creating the certificate in step Create a self-signed certificate for securing the BizTalk Adapter Service Runtime, makecert.exe takes the parameter -n “CN=yourlocalmachinenamehere”, CN is the acronym for Common Name. The CN for a website is the host + the domain name (such as www.microsoft.com). For a single machine on an internal network, the CN can just be the machine name.
When browsing through to the machine name which corresponds to the CN of the certificate, there is no certificate error:

The Request Error is normal as the BAS management service is not browsable, it can only be accessed when presenting the ACS credentials which is not possible through a browser.
Further documentation and references:
Provisioning BizTalk Service
Install Azure BizTalk Services SDK
BizTalk Adapter Service Installation
Azure BizTalk Services Resources on the TechNet Wiki (Lots of resources here!)
Official MSDN BizTalk Services documentation
BizTalk Services on the Microsoft Azure Site: BizTalk Services