
Visual Studio GitHub integration tutorial – Getting Started with Git.
This article is aimed at beginners who are new to GitHub and so also probably new to Git repositories. For those, the first thing to say is that GitHub (www.github.com) is a web-hosted Git repository. A Git repository is an implementation of a Distributed Version Control System. A subscription to GitHub is free for public repositories and several paid plans exist for private repositories.
I chose GitHub as Git repository because GitHub is becoming the leader repository for people to share code and collaborate. This is why it is important to know about Git and more importantly to know how to use it.
In this post, I will explain how to create a GitHub repository and how to use it with Visual Studio.
Note that while this tutorial is about GitHub, the Visual Studio integration part is identical regardless of the actual Git repository used. Consequently all the instructions are also valid for other Git repositories whether they are web-hosted (such as Bitbucket – another popular code sharing platform) or on premise (such as Git installed on a rerver or a TFS 2013 Git repository).
For more information about Git, you can read my previous post: Git TFS Visual Studio Integration where I compare different type of repositories (Centralized vs Distributed), introduce Git and explain how Git integrates with Visual Studio and TFS. If you don’t have time to read it, here is short summary: The post explains that Git is a Distributed Version Control System in which all nodes of the distributed system run a full copy of the Git repository. It is therefore comparable to peer-to-peer technology in which there is technically no server – when compared to traditional client/server architecture. However, in practice, a central server is used as integration point for the various members of a team to collaborate. In short, all members upload their changes to the central server and get changes from other members through that central server. In this tutorial, github.com is this central server which has the particularity of being web-hosted. I will refer to it as the remote repository or simply as GitHub. The local repository is the instance of the Git repository running on the user local machine.
The tutorial focuses on creating a GitHub repository and a new Visual Studio solution which will use the GitHub repository as Version Control System.
1. Create a new repository in Github.
- Create an account on GitHub at www.github.com. Alternatively, sign-in if you already have an account.
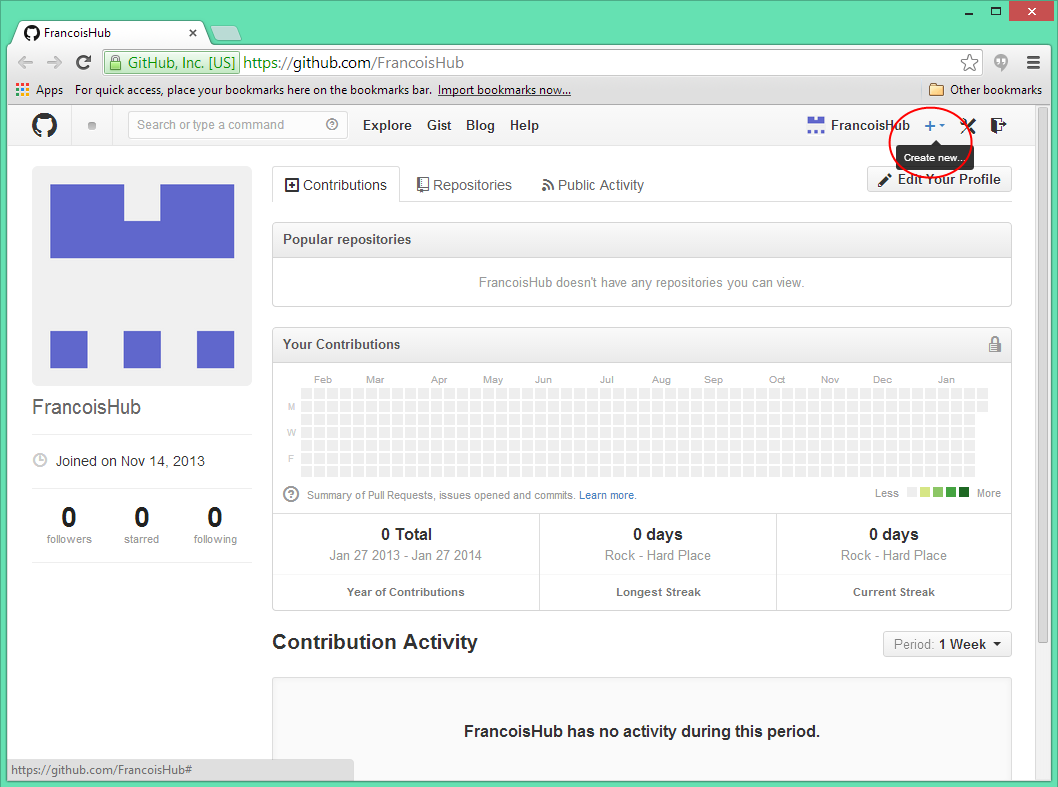
- Create a new repository by clicking on the + sign next to your account on the right top corner of the page or by navigating to https://github.com/new.
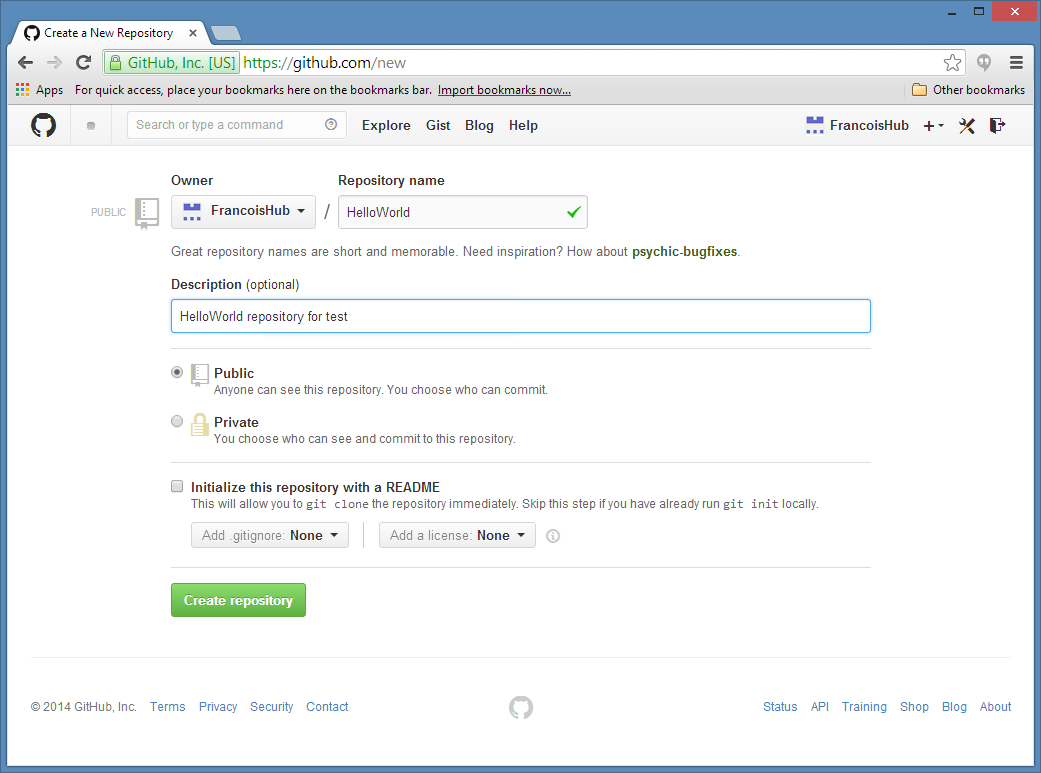
- On the screen to create the new repository, choose a Repository name and if the repository is Public (free) or Private (available with paid subscription only). Do not tick the checkbox Initialize this repository with a README so that GitHub does not create a default master branch. It would conflict with Visual Studio Team Explorer which will want to create the master branch when publishing a solution for the first time. We can create a README as well as add any other files later on.
Finally, click on the Create repository button.
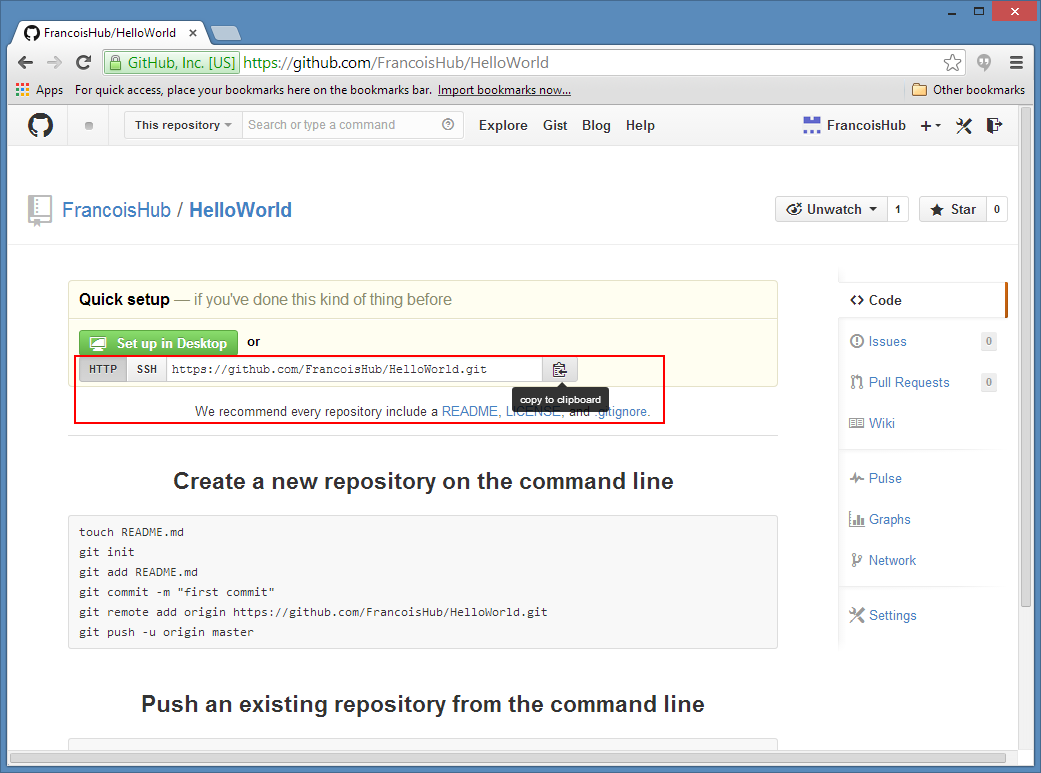
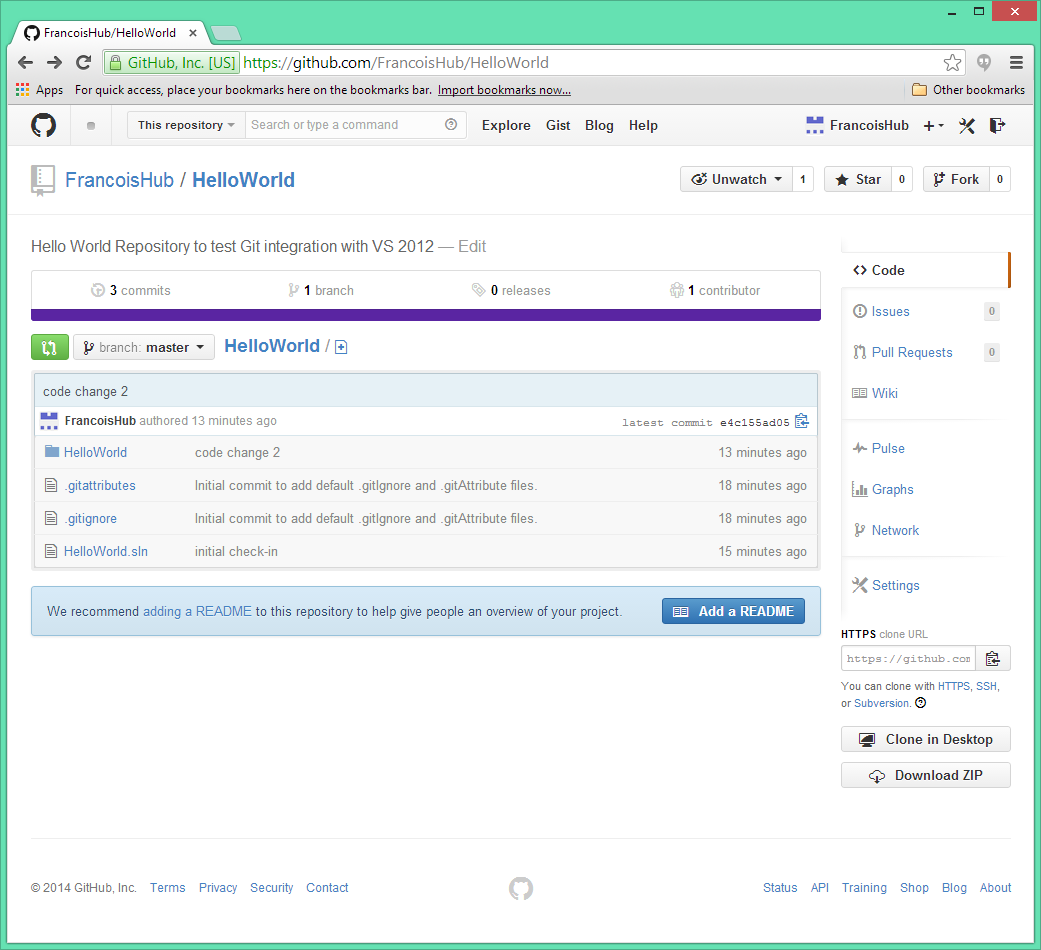
- We now have an empty repository. Take note of the git repository URL (which ends in .git) as it will be needed later on. As a reminder, refrain from the temptation of adding a README file or any other file right now as it would create a master branch which will conflict with Visual Studio when we sync Visual Studio’s local Git repository to the remote Git repository hosted on github.com.
2. Create a new Visual Studio Project.
In this simple tutorial I will create a “Hello World” Console Application:
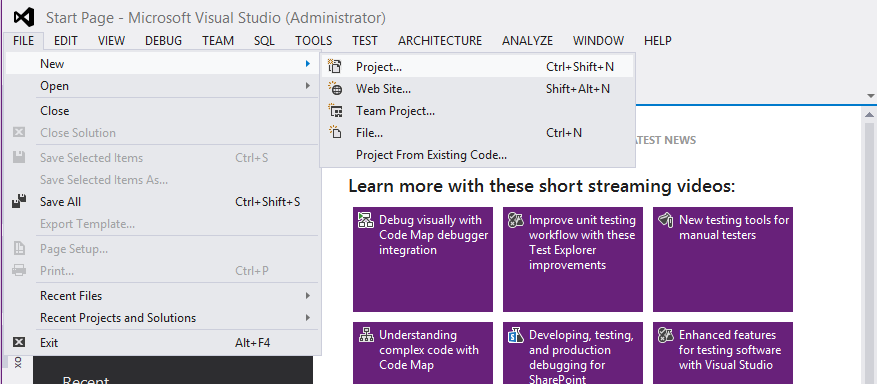
- Open Visual Studio and on the start page, choose “New Project…“. Alternatively, on the main menu, click FILE -> NEW -> Project…
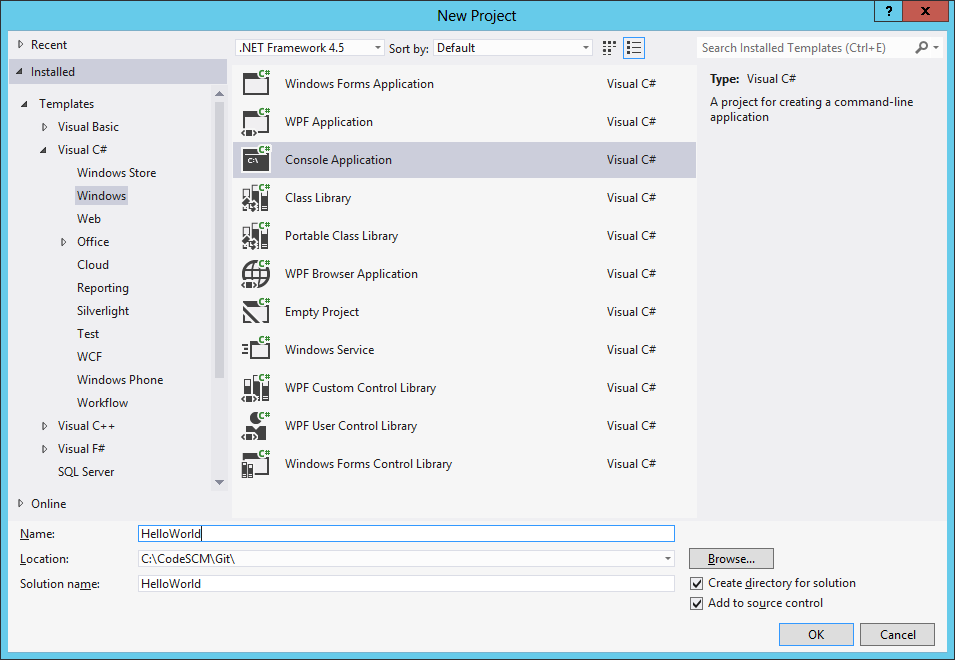
- In the New Project page:
- Choose Console Application as project type.
- Write the project name in the Name text box. In this example it is HelloWorld.
- Choose a Location which is the local folder that will be the root of the local Git repository. In this example it is C:\CodeSCM\Git\.
- Make sure to tick the “Create directory for solution” and “Add to source control” check boxes.
- Click the OK button.
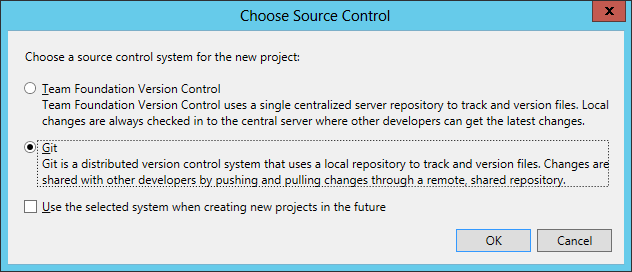
- Choose Git in the pop-up window asking which source control system to use for the project and click the OK button.
3. Adding the solution to the local Git repository.
With Git repositories we first commit changes to the local repository and can do so multiple times before pushing the changes to the remote repository (GitHub in this tutorial). This can be useful when we want to check-in changes only locally so that change history is available but we are not yet ready to publish the code to the shared repository for collaborators to use or for people of the general public to consume (in the case you use GitHub to publish your open source work to the general public).
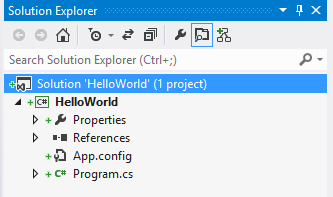
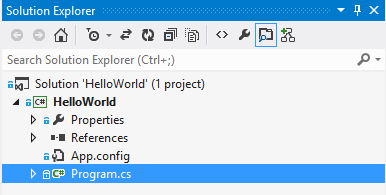
Once we have created the Visual Studio solution and ready to commit the code for the first time, we can see in Solution Explorer that all the files of the solution are marked as new.
To commit the solution to the local (Git) repository, follow the instructions hereunder:
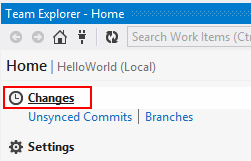
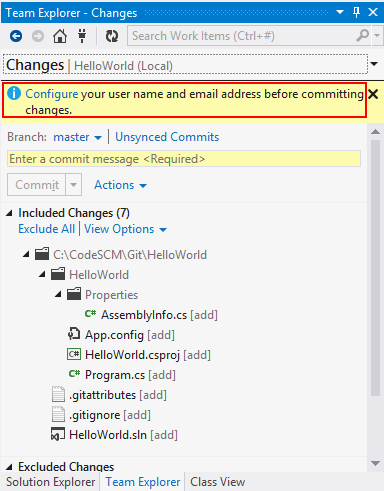
- Open Team Explorer (Menu VIEW -> Team Explorer). Make sure you are on the Home page and click on the Changes link:
- In the Changes screen, we will be prompted to configure Git settings to be able to commit to the local Git Repository. Click on the Configure link.
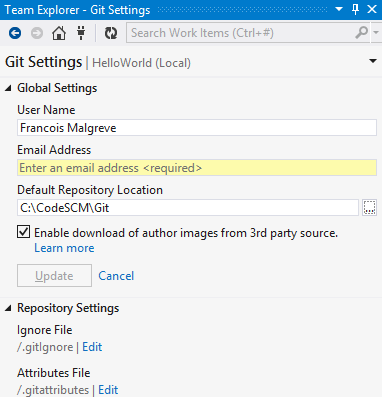
- In the next screen we configure the local repository Git Settings by:
- Filling in a User Name.
- Filling in an Email Address.
- Setting the Default Repository Location. The default location is C:\Users\WindowsAccountName\Source\Repos but can be changed as preferred. Here I set it to the same folder I created my Visual Studio Solution in (C:\CodeSCM\Git) as I prefer to put all my solutions there.
- If you want, tick the check box Enable download of author images from 3rd party source. When connected to TFS, it will use the TFS user profile image. If no image is set, an image from Gravatar will be used.
- Ignore File. Git repositories can have a .gitignore file to avoid committing non-source files that do not belong to the repository; such as temporary files or binaries that are not part of the published product (such as .pdb files). See Git reference Ignoring files for more information.
- Attributes File. Git repositories can have a .gitattributes file which defines things such as automatic indentation on commit, instruction on doing diff on binary files, … See Git reference Git Attributes for more information.
Finally, click the Update button to save the Git settings.
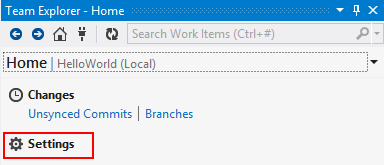
Note that the local Git settings are also directly available from the Settings link in the Home page of Team Explorer and that we could have configured them before starting the commit process. It is also how we would modify the Git Settings if we wanted to:
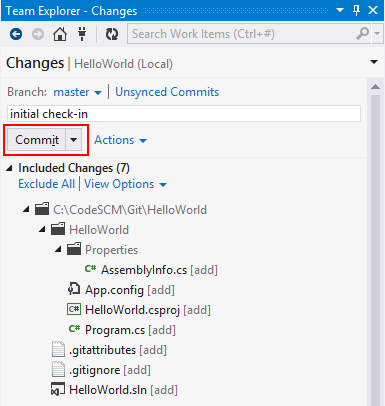
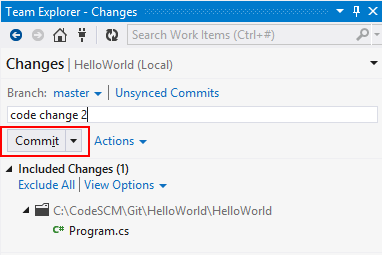
- Once the Git Settings are set, we can commit the code. The default policy being that commit messages are mandatory, enter a commit message and click the Commit button.
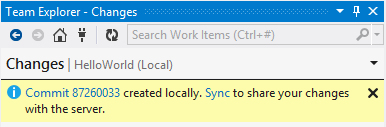
- Once the commit is completed, we have a commit success message. The message offers to Sync the changes to the remote repository but in this tutorial we will do this at a later stage. We can dismiss the message for now.
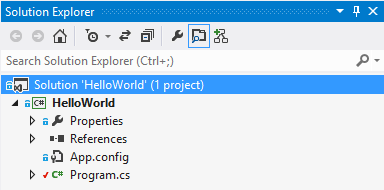
- The code is now committed to the local Git repository and Visual Studio’s Solution Explorer displays a little padlock icon for committed files.
4. Code change and local commit in Git – The Edit/Commit model.
In an Edit/Commit model, files are not read-only and we don’t have to do a check-out before editing a file, we can edit files straight away and when we do so, the local Git repository will realize that the file has been modified. Visual Studio’s Solution Explorer and Team Explorer will clearly mark the solution files that have been changed (see screenshots hereunder). It is the case even if we modify the files from outside Visual Studio. This is because Git looks at the content of each file and mark the file as edited only if the content is different. This process is executed efficiently by using metadata about the files, not through full text comparison. Consequently, if we edit again an already modified file and revert it back to its original content, Git will know that the file is now identical to its last committed version. The file will not be considered modified any more and in Solution Explorer, the file will revert back to the unmodified status with a little padlock icon next to it.
As with TFVC repositories, we can commit the code from the Solution Explorer (which will take us to Team Explorer) or directly from Team Explorer:

5. Viewing History.
As with TFVC repositories, we can see version history for individual files or the commit history at the repository level for a particular branch.
- Individual file version history.
We can see the commit history for each file from the Solution Explorer.

- Repository branch commit history.
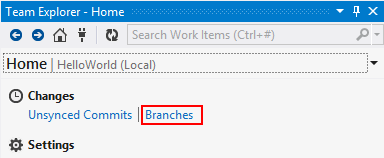
We can see the commit history at the repository level from Team Explorer. On the Team Explorer home screen, click Branches to take you to the Branches screen. In that screen hover the mouse on the branch you want to get the history for (here the master branch), do a right-click on it to bring up the branch contextual menu and select View History. You will notice in the contextual menu of the branch that it is also the place where you can create and merge branches.
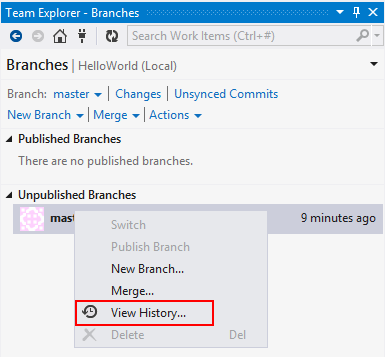
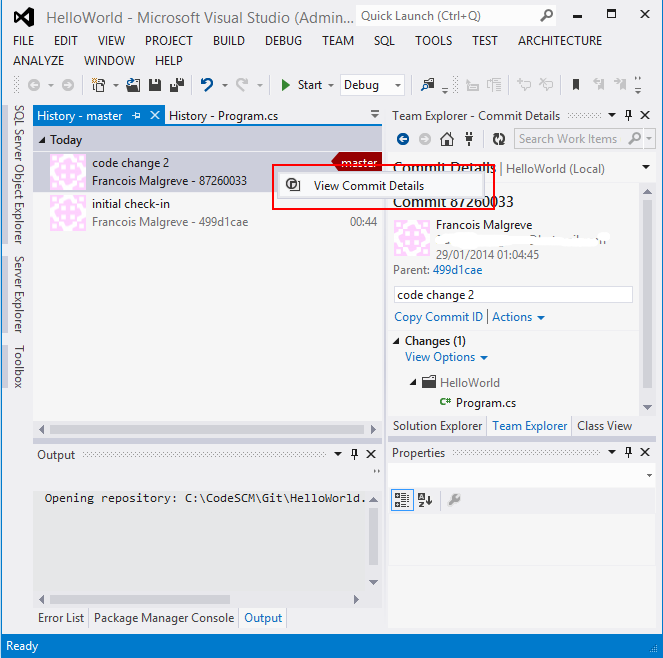
The History gives a list of the past commits and it is possible to right-click on each commit to see the details of a specific commit. The commit details will show all the files that were committed for that particular commit.
6. Publishing the Visual Studio solution for the first time to the remote Git repository.
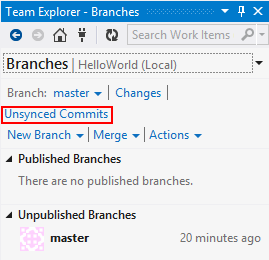
- Once we want to publish the project for the first time to the remote Git repository (GitHub), go to Team Explorer Home and click the Branches link to access the Branches screen. Once there, click the Unsynced Commits link.
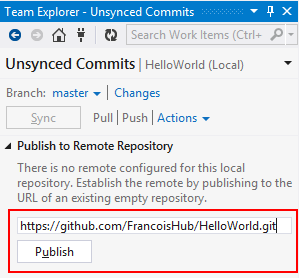
- As we did not configure the remote Git repository yet, we are now prompted to do so. The configuration just consists of the URL of the Git repository. The URL of the repository ends in .git and is available to copy from the GitHub repository homepage. I showed it in the first part of this tutorial on the empty repository home page screenshot. Once you have put the URL, paste ot in the text box and click the Publish button.
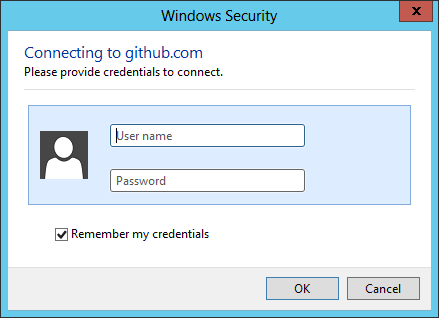
- We are then prompted with a window to put in our github.com login information:
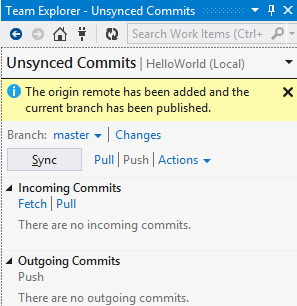
- We have now published our solution for the first time to the remote git repository for the master branch.
- On github.com, the repository will now display the files published. We can see the Visual Studio solution file (.sln) as well as the folder for the HelloWorld project. Visual Studio also automatically included the 2 files .gitattributes and .gitignore. Those files did not come out of nowhere, they were visible in the Team Explorer Changes screen when we did the Commit to the local repository (see screenshot). They are out of scope of this tutorial so I won’t go more in details about them.
7. Fetch / Pull / Push: Modifying code locally, committing to local Git and publishing to remote Git.
When working in a team we should get updates of the code from the remote repository on a regular basis to make sure that the code we are developing integrates well with the work done by other members of the team. Moreover, it is not possible to commit our changes to the remote repository without having received the latest version of the code first (doing a Pull).
- Pull
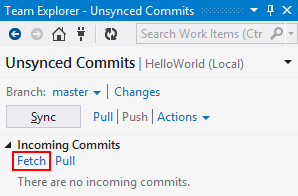
A Pull is the operation of getting the latest changes from the remote Git repository. It is good practice to Pull the code regularly so that we make sure the code we develop integrates well with the changes made by the team. - Fetch
A Fetch is the operation of getting the list of changes since the last time we Pulled the code. It is useful to Fetch before Pulling so that we can see what are the incoming changes.
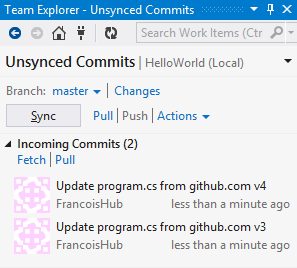
Hereunder is an example of the result of a Fetch, which shows the upcoming changes for the next Pull:
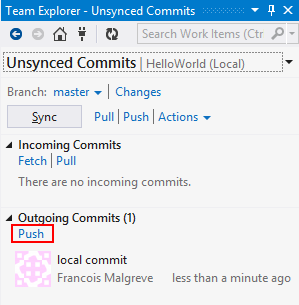
- Push
A Push is the operation of pushing the changes committed on the local Git repository to the remote Git repository.
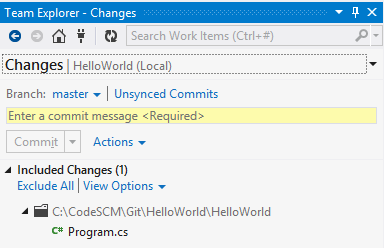
Before doing a Push we first need to make sure that everything we want to Push is Committed locally:
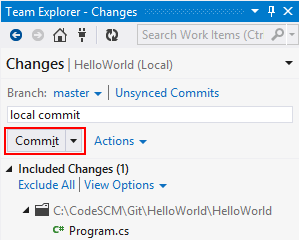
Once all the files we want to push are committed locally, we can Push the changes to the remote Git repository:
This ends the step-by-step tutorial of using with Visual Studio with GitHub repositories (or any other Git repository for that matter).